|
|
|||||||||||||||||||||||||||||||||||
 |
|
The Rules Directory only works if you help. Write a review. Get the review template here. |
|
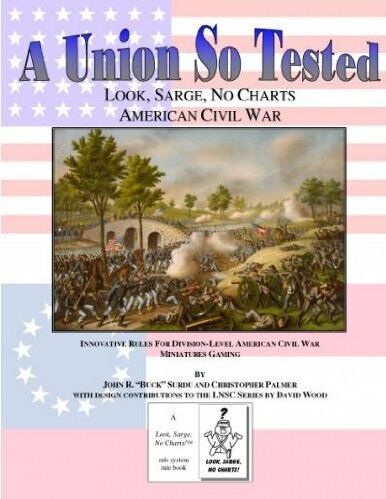
TITLE: A Union So Tested: Look, Sarge, No Charts American Civil War AUTHOR: John R. “Buck” Surdu and Christopher Palmer PUBLISHER: LMW Works PUBLICATION DATE: 2009 WEB SITE/SUPPORT FORUM: Support is available from a Yahoo discussion group here: PRICE: $29.00 in 2009 REVIEWED BY: Mark “Extra Crispy” Severin PERIOD COVERED: The American Civil War THE BOOK: A Union So Tested is a paperback 54 pages long. The rules cover the first 37 pages, and optional rules fill the remaining pages. The book contains numerous illustrations, many in color. SCOPE: A Union So Tested is a tactical game of the American Civil War. ARMY SIZE: In AUST each stand represents one regiment - players control one division each. Since stands are 3” wide the number and scale of the figures on each stand is unimportant. Assuming twenty 15 mm figures per regiment, you would need about 250 figures per division, plus artillery. BASE UNIT:
GAME SCALES:
BASING SIZES: Bases come in two sizes: 3” wide by 1.5” deep and 1.5” square. Infantry and cavalry are mounted on the larger, artillery and headquarters on the half-size base. Each base has a label indicating movement and combat factors (it is through the use of labels on the base and hand made coded dice that charts are eliminated). TURN SEQUENCE: In AUST a variable activation sequence is used. activation is accomplished by a card draw. A game deck comprised of a joker 12 cards (red 1-6, black 1-6) is used. For each headquarters a die is rolled and placed next to it. A card is then drawn. Every headquarters whose die matches the value of the card may activate. When the joker is drawn, the turn is over. In certain situations, units may only act on either a red or black card of the required value. The cards are shuffled and the headquarters’ dice re-rolled each turn. It is possible that some headquarters may activate twice while others will not activate at all in a single game turn. When a headquarters activates, every stand in the brigade may perform one of the following actions (each stand in a brigade may perform a different one):
In addition, each brigade may conduct spotting or rallying as a “free action.” GAME MECHANICS: Spotting: A carry over from the original WW2 rule set, the spotting rules are optional in AUST. Units perform spotting attempts against areas, not enemy units. During its activation, a brigade may make one spotting roll. An area is selected and four dice rolled. These spotting dice are made using stickers. Each has one infantry, two cavalry, one infantry/artillery/cavalry and two blank sides. It takes one success if the enemy is in the open, two if in cover. So you must roll two infantry symbols to spot infantry in a wood, for example. The number of dice rolled may be modified for distance and visibility. Units may only be fired on if spotted. Movement: Given the scale of each base, movement is quite simple. The unit tag indicates the various movement rates for open, road, rough etc. At the end of movement the unit may freely “reorient” by changing facing. After this free orientation it may not move, not even to pivot slightly, without activating. In general, movement for infantry in clear terrain is 6” while mounted troops move 8”. Units may not pass through each other. One interesting wrinkle is that bridges and fords have a capacity rating. Thus only three units may cross a bridge with a 3 rating. This will lead to some interesting traffic problems in many scenarios where an entire division wants to cross a bridge! Fire Combat: Direct fire is extremely simple to resolve. All units in a brigade declare their shots before they are resolved. For each shot, the firer rolls a D10 and adds its combat rating. The rating appears right on the unit’s label. If the result exceeds the defender’s defense rating, a hit is scored. In addition a “Morale Hit” is placed next to the target’s brigade HQ. Long range fire results in morale hits only. Units with two hits suffer “Regimental Pin” while units taking a third hit are destroyed. Units have short and long range values and may fire only though their frontal 90 degree arc. Flank and rear attacks reduce the target’s defense value by two. Being uphill, cover, etc. increase the target’s defense value. Melee: To engage in close combat a unit must move into contact with the enemy. The target must then pass a morale check to stand. Assuming they passed, the attacker then rolls a morale check to close. If both units have passed, resolve the close combat. Close combat is not simultaneous. The situation dictates who “fights” first. Using the unit’s close combat value (again, on the unit label) conduct it exactly like Fire Combat. the side scoring more hits is the winner - the loser retreats four inches. If the attacker won, he must occupy the ground vacated by the defender. Morale: Morale is listed as an optional rule in AUST, but is strongly recommended. As with spotting, morale uses custom dice of two types. The first die has the sides:
The second morale die has the sides:
To check morale, roll the two dice. If the result on the second die matches the Morale Value of the unit checking, apply the result on the first die. A pin (actually a bad name for it) means the unit only activates on the black cards. Retreat means the unit retreats, and Random order means it will behave as determined by a die roll. OPTIONAL RULES There are numerous optional rules within each section as well as some major sections which include re-supply and engineering operations. optional rules include command radii, attaching leaders, etc. ARMY LISTS/SCENARIOS: There are no army lists or scenarios provided. REVIEWER’S COMMENTS: One of the goals of the whole “no charts” aspect of the rules is to keep reference sheets off the table. Hence the use of custom dice, extensive unit labels, etc. And while the devices used are clever, the lead to other aesthetic compromises. Units must be marked with hits, HQs must be marked with dice, and each unit has a relatively large label. In addition the use of playing cards means there will be cards on the table. Charts have actually been provided for gamers who prefer not to have to make dice, or to use labels. Myself, I would use rosters, but that is an aesthetic choice, and an expression of my own preferences, not a criticism of this book. The book is well laid out, well written and proofed, loaded with detailed examples (Huzzah!) and diagrams. I especially like the numbering of the sections. All sections of the X.1 are overviews. All sections of X.4 are designers’ notes, X.5 optional rules and so on. It makes it very easy to read just the rules and go back to examples after. To see some photos of the game in action visit Buck Surdu’s AUST home page here. PLAYER’S COMMENTS: Not played. To read comments by others or leave one yourself, please click here. |
|
[Home] [15mm World] [Reviews Home] [How To] [Beginners Guide] [Gamer's World] [Spanner & The Yank] [Points of View] [The Annex] [Links] [Say Howdy] [Corporate Schill] [Rules Directory] |
 |
