|
|
|||||||||||||||
|
|
|||||||||||||||
 |
|||||||||||||||
 |
|
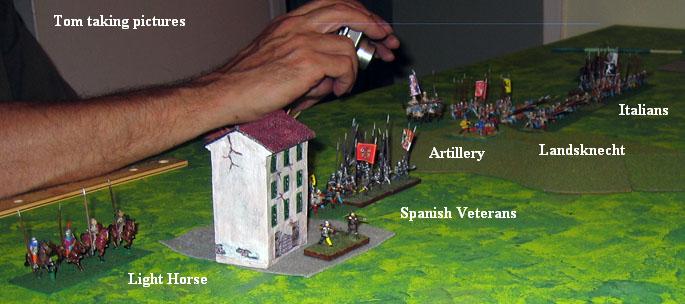
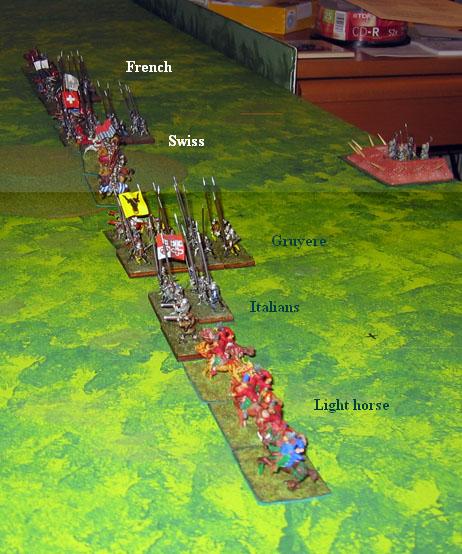
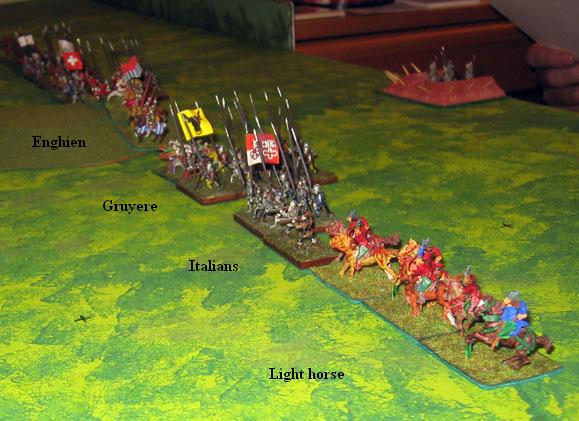
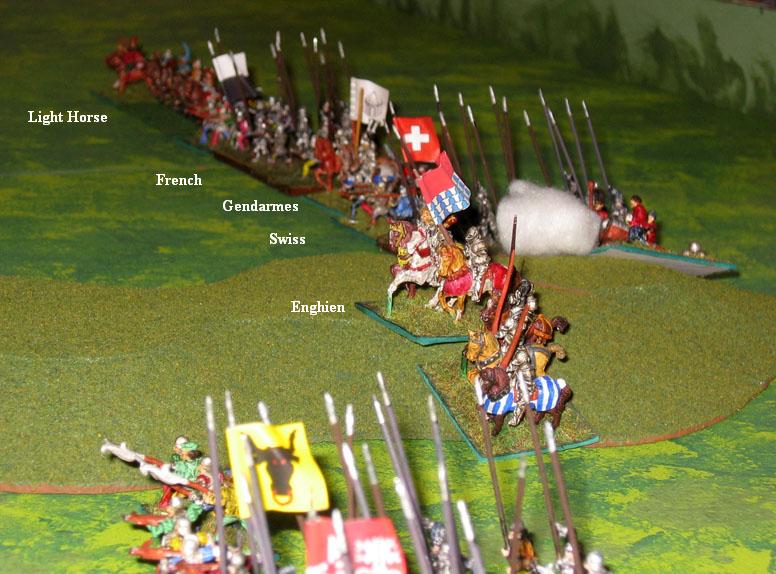
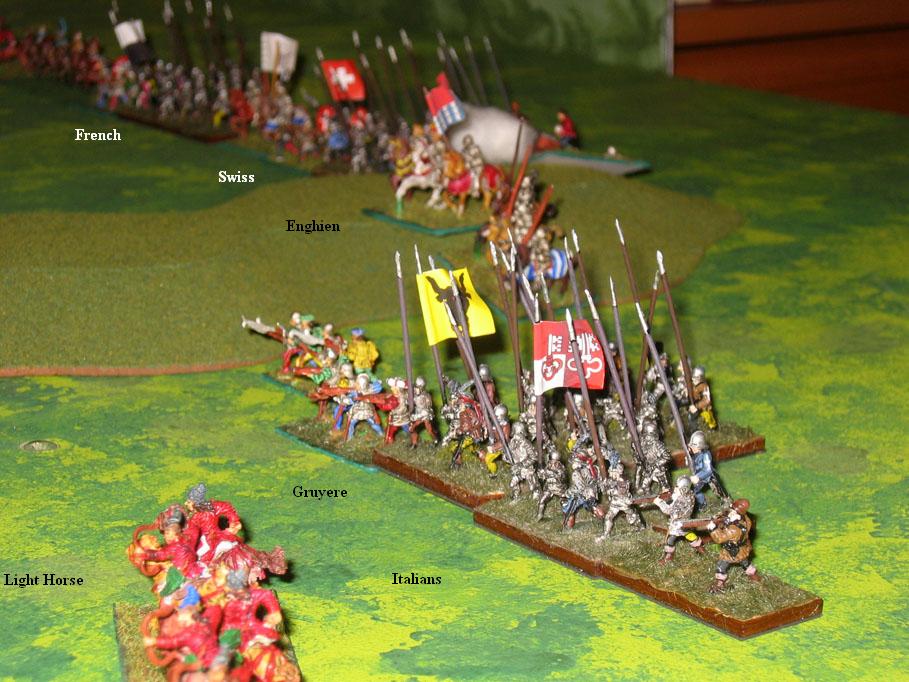
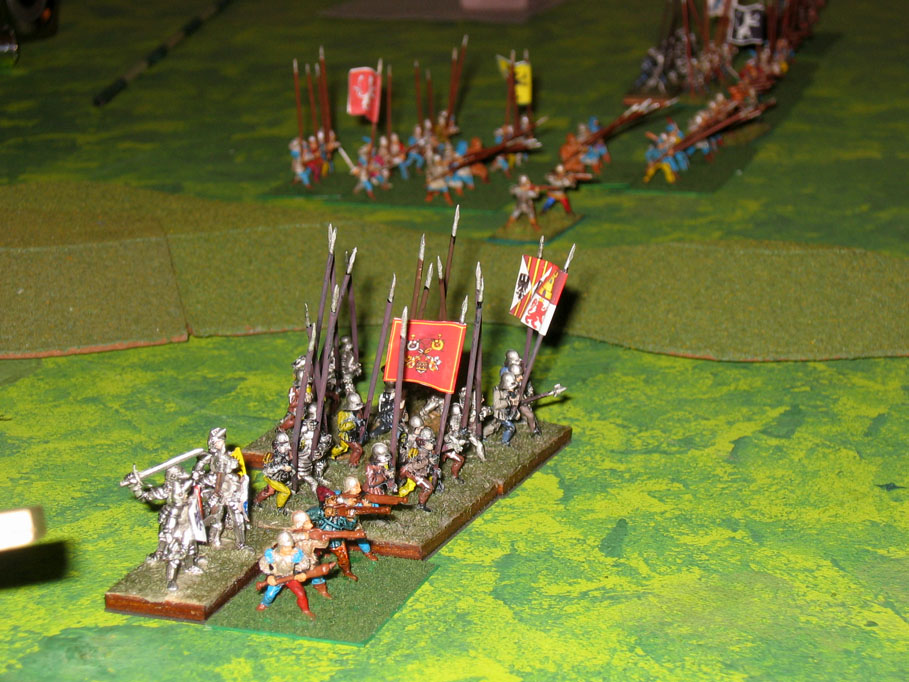
Today we are pleased to have with us Guest Chef Vincent Tsao. Vincent is presenting a Renaissance dish known as Maximilian! These are the updated version of the original which have been out of print some time. They are available from Scale Creep Miniatures in the US and from Black Hat Miniatures in the UK. Please read the disclaimer.... First Look I found the rules in my mailbox this weekend and have been giving them a good reading. A glance at the QRS indicates their relation to DBA. Further inspection shows just how different the rules are. Basing is pretty much the same, though there is a new infantry type called Forlorn Hope, tough infantry armed with a mix of melee weapons and firearms with 3 to 5 The ground scale is much different. An element of DBA heavy foot might represent 1,000 to 1,500 troops. In Maximilian! the same element might represent 200-240 troops. All troop types move faster than DBA counterparts with distances are given in centimeters. All distances listed below are for the 15mm version. 25mm distances are 50% greater. Heavy infantry move 12 cm, nearly 5 inches. Weapons ranges are much longer â“ heavy artillery can reach 30 inches (75 cm) across the table. Arquebus and bow can fire 180 cm, over 7 inches. Light cavalry, missile foot, light foot, forlorn hope and artillery may all shoot. Artillery includes light, medium, heavy and organ guns. As far as I can see there is no ZOC. Movement differs in that single elements don't have the same free movement as in DBA. They can move forward, oblique, wheel or about face. That's it. The QRS makes combat look about the same. But there's a major difference. Each turn can have up to three rounds of melee, with most troops required to follow-up any recoils. If any round ends in a tie both sides recoil, though if their combat score is high enough each will lose the front rank element instead. If one side forces their enemy to recoil in all three rounds, the enemy breaks and is removed. After the third round of combat all forces still in contact recoil and break off. This should make for a very different kind of fight than the usual DBA scrum. Pikes are effective up to four ranks deep, and most other troops up to two ranks deep. An optional rule for Reiters lets them fire in caracole up the three ranks deep. These will allow your renaissance tables to have the right look â“ an important consideration for me. The rules are not for tournament gamers. Don't play these with a must-win rules lawyer, though I don't know why anyone games with such people anyway. These rules will digest more easily when played by gentlemen â“ or gentlewomen. Army lists allow anywhere from 24 to 36 elements (not counting the general's) depending on the army. I need to buy some more halberd elements to field my Swiss with these rules. Bill's Burgundians had better watch out. Armies start to retreat when they lose 1/3 of their elements and rout when hey lose half. There is an option for Italian mercenary armies fighting before the French invasion of 1495 to have retreat/rout points of 1/6 and 1/4, thus replicating the cautious style of the condottiere. I think I shall have to figure out handicaps for the Swiss â“ they seem like a super-army. Likewise English longbows are probably very tough in these rules. The French might have a rough time at the end of the Hundred Years War with these rules â“ perhaps the English should be hobbled with poor commanders. The Ottoman Turkish list looks interesting, with Janissaries rated as Forlorn Hope. With lots of cavalry, Janissaries, artillery and a bunch of low-rated Azabs and such, why it's enough to make me think of raising Suleiman's army. I really needed to have a new project. Anyway, this is all based on my initial reading of the rules and I'd appreciate feedback from someone who has played the game. [Editor’s Note: The above was originally published on The Miniatures Page. Used by permission.] The Battle of Ceresole, 1544 The Corlears Hook Fencibles played a game of the 1544 battle of Ceresole using the Maximilian rules last night. Bill played the French commander d’Enghien and Tom played the Imperial commander del Vasto. A slight ridge runs across the field from the Imperial center through the French center. It gives no advantage for being uphill. It mainly serves to obstruct vision from one side of the field to the other, a feature of this battle. The order of battle for both sides were based on my reading about the battle with a few small changes from the lists in the rules. The French had 31 elements on the table to the Imperial 33. The French were outnumbered in foot but had twice as much cavalry. Both sides had a mix of raw, regular and veteran troops. Neither side knew about the scenario in advance. They could see the enemy deployment but didn’t know the morale grade of opposing troops until contact was made. From left to right, the French had light horse, raw Italian foot, raw Gruyere foot, heavy artillery and Enghien’s gendarmes and cavalry along the central ridge, Swiss foot, gendarmes, regular French foot and light horse. Opposing them were Florentine light horse, raw Italian foot, regular Landsknechts, Vasto’s gendarmes and artillery on the ridge, veteran Spanish foot and Neapolitan light horse. The Imperials were attempting to raise a siege so they moved first. Tom moved his infantry forward on both sides of the ridge and his guns fired and missed. Bill’s French guns scored a recoil on the landsknechts, requiring them to use two pips the next time they moved. The landsknechts struggled forward again. Then, frustrated by low pip rolls, the imperial center and left came to a halt while the Spanish veterans surged forward on the left. The Gruyere and Italian foot came forward to meet them. The French light horse rode forward between the two blocks of foot and fired into the Spanish with little effect. Spanish arquebusiers traded shots with the light horse. The Spanish pikes advanced and began shepherding the light horse slowly back. Low die rolls saw Tom change his dice. Both sides concentrated on this fight, with troops on the other side of the ridge sitting down and breaking out their lunch. Veteran Spanish pikes slammed into the Gruyere, shoved them back three times in a row and slew the lead element. The Gruyere arquebus unit wheeled on the flank of the Spanish pikes and killed the rear unit with their fire. The Gruyere pikes attacked from the front. The fight was a high-scoring tie, which means both sides lost their lead pike element and drew back. On came the Spanish again, shoving the Gruyere back and killing another one. A confused scrum of Spanish arquebus, swordsmen and light horse against French arquebus and light horse continued, with the Spanish slowly getting the upper hand. Spanish losses were heavy, but the Gruyere and Italian infantry of the French were being annihilated. The Gruyere halberd unit attacked Vasto and pushed him back. One footman had hold of Vasto’s stirrup for a moment. But then the gendarmes rallied and beat the halberds, riding them down. Spanish pikes scattered the last of the Gruyere pikes and spotted the French camp. Vasto rode forward to keep them from looting. They made an about-face and charged Enghien. The French commander was pulled from his saddle and captured. This put the French over their retreat number. Bill said he would withdraw and Tom was pleased to see him go. Tom’s Imperialist losses were 5 elements - 1 landsknecht pike slain by artillery fire, 1 Italian light horse and 3 Spanish pikes. Bill lost 3 light horse, 2 raw Italian pikes, 4 raw Gruyere pikes, 1 raw Gruyere halberd and 1 Gendarme, with Enghien captured. That makes 11 elements, with the CO’s element counting as 4 for a total of 13 elements lost. If we were playing a campaign game a couple more French elements in the confused scrum would probably have failed to get away. The game took 1 hour and 40 minutes to play. The combat system worked well. Both sides had most of their forces sit and watch each other while the Spanish struggled with the Gruyeres and Italians. Part of this was due to the field that I’d chosen, part of it was the historical deployments. The French would have needed 7 pips to move their whole army as it was deployed. The Empire needed at least 5. Both players said they didn’t have nearly enough pips. They said one command dice worked for 12 elements in DBA but 1 dice for 30+ elements was not enough. We will try this again at some point with free deployment and a field that’s not bisected to see if this problem will be lessened. There are some rules questions that arose during play. I’ll ask the designer via email - he’s been helpful. All told, while we liked the look of the game, the pip problem and some lesser questions about rule details means the jury’s still out on Maximilian. Another look is needed.
Questions:
By Vincent Tsao Published August 28, 2007 |
 |
|||
|
|
|||
 figures on each base. They are tough customers who don't want to fight gendarmes in the open. Command and control is nearly the same as DBA, with good generals rolling a D8 and poor ones a D4 for pips. Like DBA, figures are not counted and so you can easily use 2mm, 6mm or 10mm figures without any changes. The rules say an average game should take about an hour, longer if multiple armies are fielded.