 |
|||
 |
|
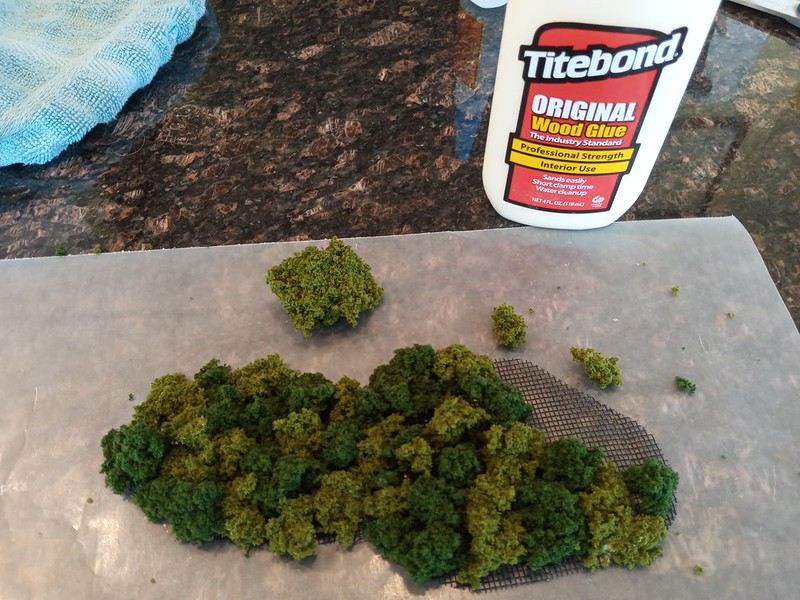
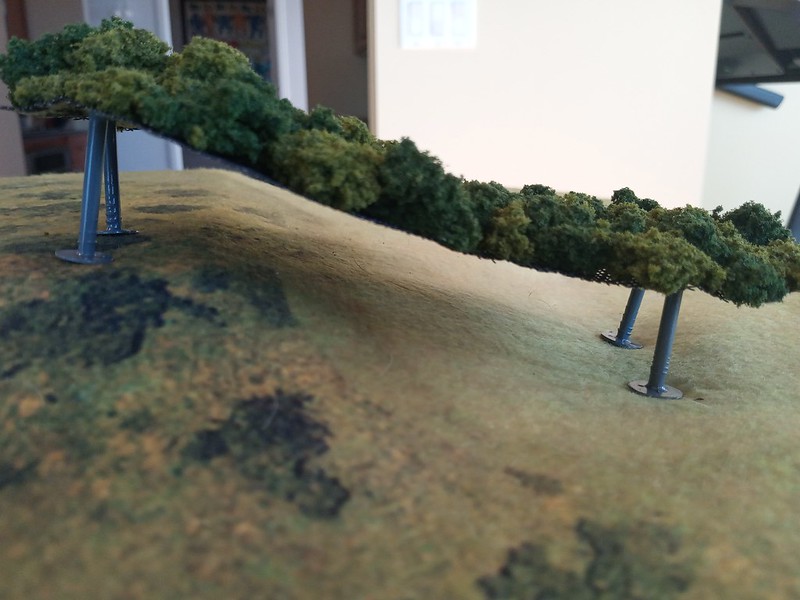
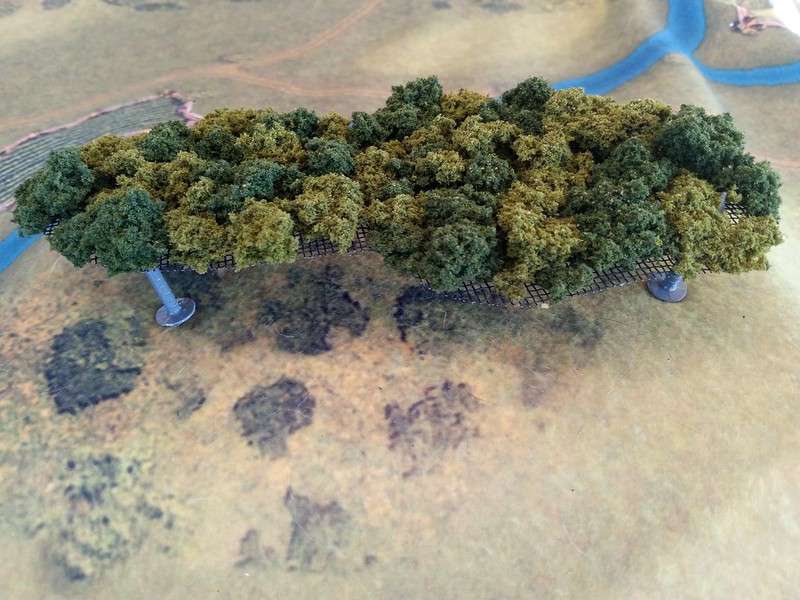
For many gamers, representing forests and woods on the table top is accomplished by laying down scatter to represent the forest area and then placing individual trees within. This allows trees to be moved around if troops enter the area. But in some games this just doesn’t look right. So many gamers make canopies instead. Basically, you cover a piece of foamcore with clump foliage. The canopy is supported by roofing nails, toothpicks or dowels which act as “trunks.” The down side to these canopies is that they are rigid and will not flow up and down hills. I’ve been toying with ideas on how to do this and hit on a winner. The secret: aluminum window screen. Making these is literally child’s play (remember cut and paste from kindergarten?). The pictures here are all from my prototype. Production canopies will use shorter nails, and the overall appearance will be much cleaned up. Step One: Buy some aluminum window screen (or stop by a window shop and ask for scraps). Cut the screen with shears into your desired forest shape(s). Spray with dark green or brown spray paint. Step Two: Lay your forest shape on a piece of wax paper. Using wood glue, a hot glue gun, or tacky glue, cover your screen with small clusters of clump foliage. I think it looks better if you use two or three different colors. Be liberal with the glue and press the clumps down so they really absorb some glue and will have a good hold.
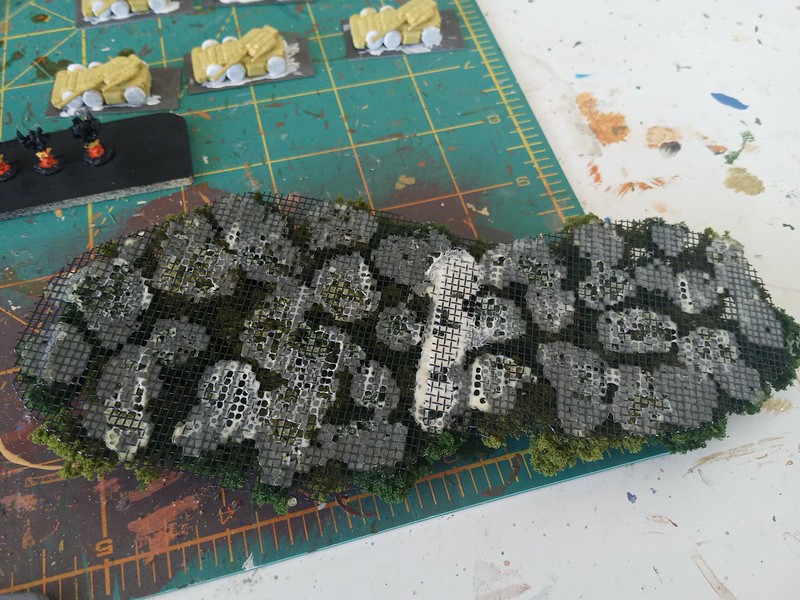
Leave some space between the clumps. Don’t pack it too tight. The clumps need room to flex when the canopy if bent over your elevations. Let the canopy dry very thoroughly (with wood glue, overnight is best). Here’s a shot of the underside:
Step Three: Peel off the wax paper. Give the canopy a shake and if anything pops loose, re-glue. Once the canopy is well set, give it a light spray with watered down PVA or a heavy spray of your favorite flat lacquer. I love cheap Dollar Store hairspray for this. Don’t use your good artist’s quality stuff. Step Four: Trim the mesh. Check the edges of the canopy and snip off any screen that didn’t get covered with foliage. Step Five: Decide what you want to use for trunks. Roofing nails work, as will thick toothpicks, chopsticks, etc. You could even use centrally glued wooden cubes as the edges of the forest will not droop, if the canopy is not too large.
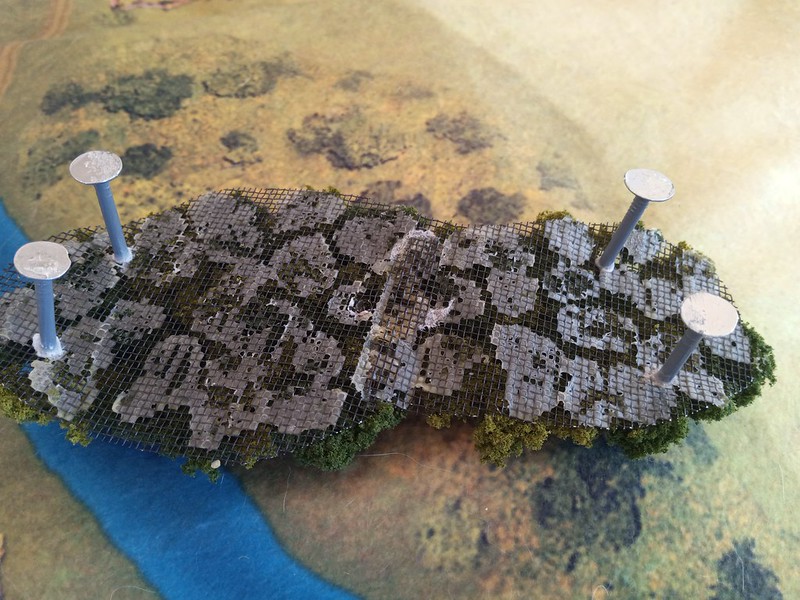
Paint your trunks. If using roofing nails paint and flock the nail heads which will be the feet of your canopy. When dry, glue them to your canopy. I use roofing nails, spray painted gray. I give them a brown wash and then add flock to the heads. If using pointed items like nails, I make a hole in the mesh and fill it with white glue. I then add a big drop of CA/super glue to the nail and push it in to the hole, making sure the point does not extend above the canopy (ouch!).
This is a simple and effective way to create a really great looking forested area on your table top. Most of the materials are reasonably cheap, and you can make a LOT of canopies for $25. It is, however, somewhat time consuming. Gluing little clumps is just a tedious business. But it’s also a tad mindless so easy to do while you watch an old classic or listen to your favorite podcast.
|
 |
